Showing posts with label orchard. Show all posts

Sunday, September 27, 2015

Beehives No. 3...

Further to our previous post: Bees, Boles and BearsBeehives 1 and Beehives 2, this post is to share an exciting new form of beehive which is minimally invasive on bees at the time of harvest, and so much easier to harvest from. No more masks and spaceman suits. The modern apiarist is about to change...


First though, we had planned to make some ornamental beehives for the potager garden or orchard. The beehives we previously had on the farm have moved on, but we still want to have honey bees as they need protection, and we need them to pollinate all our fruits trees and provide our guests local honey.   We had decided to essentially build a more decorative version of the standard Langstroth hive that most people would be familiar with.


I came across these photos of some ornamental hives that have been built for the rooftop of Fortnum and Mason in the middle of Piccadilly which I liked and planned to model our new hives on....


I love the design of their hives, as well as that F&M colour. The shape reminds me of a diagram I found of an antique beehive...


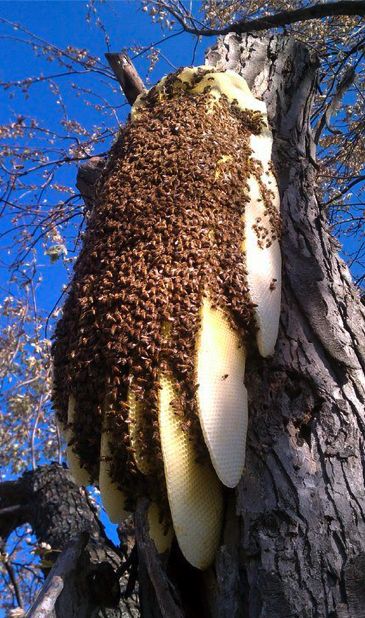
The langstroth hive has been the standard type of hive for eaons. Although they are better for a colony than a woven skep, which can only be harvested with the compete destruction of the hive, their time has come to an end...


The flow frame is perfect for novice apiarists like ourselves because of the ease with which you can harvest the honey.


One just inserts a tube and cranks a lever and away it flows...

Here is a video clip explaining how this new system works. We will definitely be supporting Flow Hives.


We plan to have the best of both worlds - we will buy three complete flow hives and then add ornamental woodwork to the outside, such as creating a little front porch over the main door; and paint them a similar colour to the F&M hives (actually a duck egg blue to match the trellis obelisks in the potager).


We already have a friend who can get us a swarm of bees.

Now we just need to decide where at Willowbrook to make our bee garden. Perhaps Spencer's Corner, or Little Hollows?


Saturday, July 25, 2015

Life In The Sloe Lane...


This week we have six sloe trees arriving to be planted in Badger’s Wood. We have waited patiently for several years to get our hands on some of these. There is only one nursery in NZ which grafts them, and for the last few years there has been a waiting list which outstripped supply due to a poor rate of the grafts taking. However, this year we were top of the list and have secured enough to grow our own little Blackthorn spinney within the woods.

Sloes (Prunus spinosa) are a member of the plum family, which grow wild in many places throughout Europe (and supposedly, according to Wikipedia, many places in New Zealand, although with years of searching we have not been able to find them growing in any of the hedgerows!).

Their common name of Blackthorn derives from the dark bark of the tree, which has large spikey spurs protruding from it. In the spring it blossoms with creamy white flowers which develop into a small highly astringent dark purple berry, known as a sloe. It is similar I guess to a Damson. 


The fruit is used for preserves and for fillings (once combined with an unhealthy amount of sugar to make it palatable); and also for making sloe gin, which is a liqueur made by steeping the sloes in large jars heaped with sugar and then topped with plain gin and left for 6 months.

Traditionally the fruits are picking after the first frost of autumn. The frost allows the fruits to start to bletch a little (although these days one could pick them any time and put them in the freezer to achieve this). I like the tradition of picking them after the first frost, it seems so much more in-tuned with the passing of the seasons and leaves one something to look forward to. 

Once picked, the fruits are then pricked several times piercing the skin. It is traditional to do this with one of the thorns from the bush itself. Once pricked one puts them in a wide necked jar or demijohn and for each pint of sloes (570 mls) one adds 4 Oz (110g) of sugar. The jar is then filled up with gin and left in a cool dark place for a minimum of 3 months, but much better 6 months (as when made sufficiently slowly the liqueur starts to take on a slightly almond-like taste as well, from the berry pips). 

Above photo from London Eats Blog

The sugar is vital not just to humour the bitterness of the berries, but to help draw the flavour out of them into the gin. Turn the jars every day for the first week, and then every week for the remaining time. The gin will take on a lovely deep crimson hue. At the end of this time carefully decant the gin into display bottles and label. Be careful not to discard the sloes as these will now make a nice filling for a pie, perhaps mixed with strewed apple to make them go further, or for creating sloe truffles!


 Sloe Truffles
To make sloe truffles put the left over fruit into a pan and gently simmer until there is minimal liquid left in the mixture and the fruit has softened well. Rub the sloes through a sieve to separate the pulp from the stones. Weigh the pulp, and then add the same weight again in sugar (would make a great treat for the festive season due to both timing of completing the gin and in not caring about what one's waistline does for that month). Simmer again until all the sugar has fully dissolved (one does not want a crystalline filling). Scrape into a jar and leave to set. At this point you can also use this sloe mixture on biscuits with cheese, like quince paste).  To make truffles blend the mixture with an equal amount of dark chocolate (or milk if you prefer), roll into little balls. Allow to set and then dust with cocoa powder and enjoy.

Sunday, March 8, 2015

Garden Update...


Despite Peter telling me it hadn't rained at WBP for almost eight weeks, the universe decided that the three days I was home would be the perfect time to bucket down. The gardener and farmer in me didn't mind, although it did not make for the brightest condition for photos. It did provide some dramatic stormy backdrops for shots such as the one above of a sphinx with Badger's Wood in the background. 

As we head into autumn the greens will give way to yellows and browns, so until the new growth and unfurling flowers of spring, like trumpets, herald our long awaited opening, here are some shots of the greenery....

Above and Below: Plums and Prunes.
Above: Quinces.

Above: A cider Apple tree (Sweet Alford).

Below: A dual grafted Apricot tree.
Above and Below: Beurre Bosch Pears.
Above: Belle de Jumet Pears. They are a late harvest pear and should be ready by the end of March.

Above and Below: Damsons. These should be ready mid-late March. Peter is going to pick them and then we shall make Damson Jam when I return in 4 weeks.
Above: Elderberries.

Below: Turkish Figs.

Above: Before Netting.

Below: After Netting.

Above: A view of Badger's Wood from the roof. On the right you can see the culvert which has been placed in antcipation of building our Palladian Bridge.

Above: The final good shot before it tipped down...


Above and Below: A brace of Heron who have made their home at WBP. Heron are a protected species, so they are very welcome to come and fish in the lake or pull up worms on the lawn.

Above: Parterre with buxus partitioning planted, awaiting the planting of the flowers in the spring.

Above: The Bell Lawn and Urn en Flambeau from Terrace.

Below: The same as view from roof.

The Camellia Lawn

Above: View down the lime walk from the roof, looking towards the site of the rotunda.
Above: The view from the Rotunda towards the Bell Lawn and Urn en Flambeau

Above: The view towards the manor from Rotunda.

Below: The view towards the Elysian Fields and Farm from Rotunda.

Below: The Elysian Fields, where we are going to sow our wild flower project.


Above: One of two newly replanted knot gardens. The original ones succumbed to a lack of weeding and neglect during a single spring from which they never fully recovered. This time we have planted just the buxus hedging, and have planted it through weed matting with mulch on top...

We replanted them in spring just gone. We had to remove everything, spray the ground out three times, and start from scratch. Willoughby, rest his soul, was still around, but not up to helping much...


Once the hedge is established we will grow the herbs in nice pots above the ground (as the main failing of of previous attempt was the difficulty of weeding around the herbs, not the hedges). The pots will additionally provide interest through their height. Peter has become excellent at shaping the buxus...


Below: Hibiscus syriacus "Coelestris". 
Such a lovely shade of purple.

Above and Below: We have added a focal point to the view through the olive grove in the form of a bust of Helena on a spare plinth from the building project.

Lastly the two corners of the garden seldom shown (as they are far from reaching their potential). Spencer's Corner...
This is the corner through the archway in the hedge where Spencer is buried. This winter we are going to plant a thicket of oaks there.

The other corner is known as "Little Hollows". We plan to create a semicircular seating area in this area, looking back towards the manor. Behind the seating will be our lilacs and some silver pears. At present there is a small recycled shell planter on a recycled plinth...

In the next post we will give you a sneak peek into the interior progress. See you again then.
Related Posts Plugin for WordPress, Blogger...