He had made a circular template of the culvert girth with hose pipe, and allowed for the flaring at one end.
Saturday, May 16, 2015
Neo-Palladian Bridge Part 1...
Above: Yours truly basking on the Palladian bridge at Stowe.
Every country estate needs gates, follies, a lake, and a bridge. Our visit to Stowe confirmed in me a case of 'bridge envy'. Wouldn't it be lovely to have a Palladian bridge like the one above?
However, everything must be in scale and if one is creating a smaller country estate, one needs a scaled down lake and a scaled down bridge. I have shared some of my thoughts previously about choosing a bridge. I was dead set on having a Palladian styled bridge, but would have to find something which would fit the scale of our lake (currently being relined and re-landscaped for the third time). This one below has a classical form on a small scale. I thought it was the perfect homage to Stowe...
... until I saw these pictures of the bridge at Chiswick House. Our bridge needs to flare out at either end, so the Chiswick House bridge was a good design to fuse with the first little bridge to create the right one for WBP.
Above and Below: The Palladian Bridge at Chiswick House, London.
So I got to work on Photoshop and reusing elements that were already being cast for the balcony balustrade and urns that we can make casts of from around the garden, I came up with this design...
Our bridge started with the help of my uncle, David, who helped Peter to excavate the dirt out of the near end of the brook where it will flow out from the lake. They dug out a swelling ready to have the culvert laid.
He had made a circular template of the culvert girth with hose pipe, and allowed for the flaring at one end.
The concrete company then came and placed the very large culvert in the gap, which fitted perfectly. The culvert is deceptively big, you may not realise from this photo that it is over 2m long and over 1m in diametre...
This photo with Peter standing next to it gives it some scale...
Above: The view over bridge to be, towards Badger's Wood and The Manor.
Below: View back the other way.
Below: View from Elysian Fields back towards the bridge to be, with the Willows and Brook on the left and the back of Badger's Wood on the right.
Below: One of the Dietes grandiflora orchids which run the length of the brook, in flower.
Other neoclassical bridges that provided inspiration include these two slightly arched bridges...
And the Palladian Bridge at Wilton House (differing slightly from the one at Stowe in that it has steps at either end)...
A sweet little bridge similar to the the first one we liked...
Below: The footings going in...
The brook dries up to being non-existant over most of summer, with only the dietes marking the boundary on one side. Once they are more established one won't be able to tell the bed is dry unless one looks closely. Over winter it is full the entire season.
Below: The approach to the bridge from the house via the newly laid path..
Below: Peter looking at the bridge with the empty lake, liner now removed, on the left.
Now we just need the balusters and plinths to be placed, and the sides to be rendered in plaster. More pics this July when it is finished...
Labels:
Bridge,
brook,
Chiswick House,
lake,
Neo-Palladian,
Palladian,
Riparian,
Stowe
Tuesday, May 12, 2015
Building Progress...
Well, things are slowly progressing. We are trying to stay positive despite torrential hiccups. But then, as the saying goes "if it's not OK it's not the end".
The bulk of the marble has arrived, although for some reason the curved edges for the upstairs areas were not in the shipment with the other tiles, so they are currently being air freighted from Greece (I've no idea what it costs to airfreight several cubic metres of marble from the other side of the world but it is going to cost someone for their mistake). Below is one of the crates of marble that did arrive...
Above: You can see the Parnon Gray marble on the left for the Blenheim Ensuite and the Rosso Levanto on the right for the Chatsworth Ensuite...
Above: Parnon Gray
Below: Rosso Levanto
The external window frames, sills, architraves, corbels, Juliet balconies and column capitals stacked up in courtyard ready to be fixed to the building envelope...
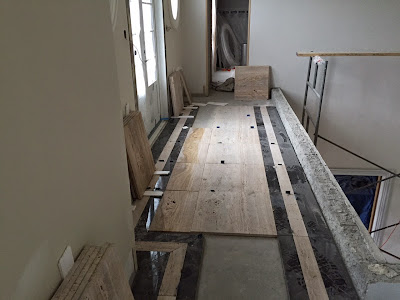
Below: They have made a start on laying the black and beige marble for the upstairs landing and long gallery...
And the solid marble risers, etched for tread, on the staircase...
Above: View from landing across the atrium.
Below: Adrian holding one of the baluster molds on the edge of the gallery so we can get an idea of whether the baluster design was OK (it has to be 1m high for compliance, which means the proportions can get a little stretched). We think this will look OK.
The Blenheim Suite, plastered and ready for painting...
Left to right: Wardrobe, Espresso bar cupboard and Ensuite...
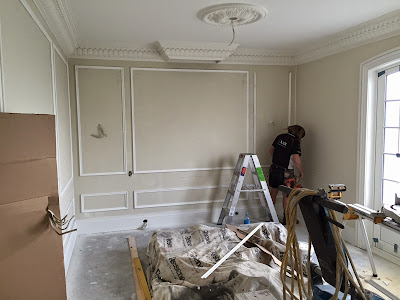
Below: The Wainscoting going on the Brideshead Walls...
and the Master Suite...
Meanwhile, outside they are starting to pour the mid floor frieze and erect the columns of the loggia...
Above and Below: Frieze band and Loggia columns awaiting capitals.

Above and Below: The concrete poured into the frieze band (above) and the finished effect (below)
Below: The dentils and top frieze band (the green cabling is for the external security cameras).
While the builders have been hard at work with the manor house, Peter has been busy building the folly for the hill behind the lake, which we should be able to share some photos of next month. Later this week I will post some progress photos of the inside of the carriage house. TTFN.
Subscribe to:
Comments (Atom)


